![]()
|
How to schedule a task to Auto-Sync the SQL
Tables |
Create
a “Scheduled Task” on the Windows Server that hosts the Parklane data files.
Ensure
the “server\ParklaneService” account is configured and you have the account password.
Create a Task
Select: Windows Tasks Scheduler
Right-click: Create Scheduled Task
Use: Parklane SQL Sync.xml
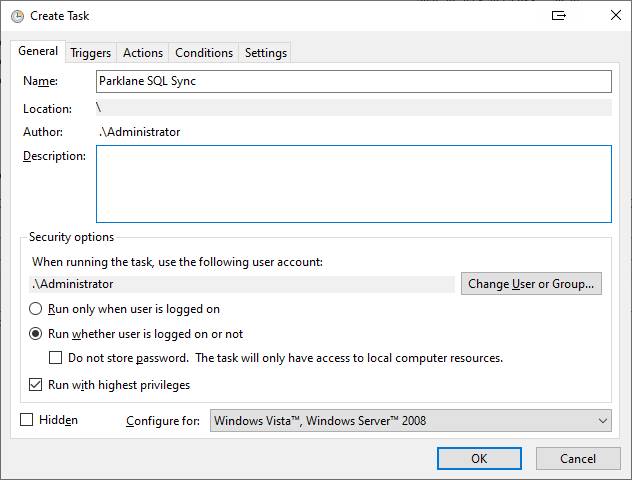
Select: Run whether
user is logged on or not
Select: Run with highest privileges
Button: Change User or Group
Enter Account: domain\ParklaneService
Indicate
the Triggers
Enter schedule
date/time. Example: Weekday schedule at 2:10am
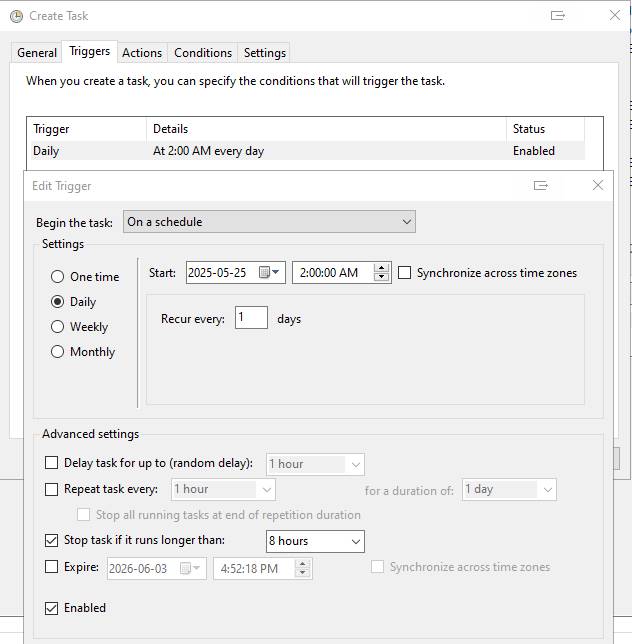
Start at 2:00 AM.
Select: “Stop task if it runs longer than:” (default to 8 hours, or longer if needed)
Edit
Action
Program: D:\Prod\HS\PSSQL.CMD
Start in (is required): D:\Prod\HS\
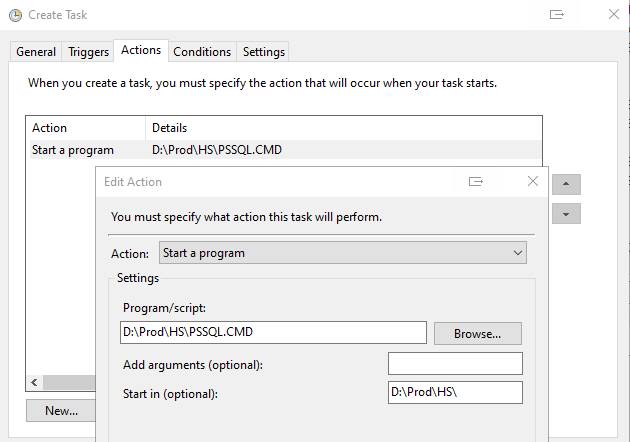
Use the path to
your HS folder on your server.
Please note that you cannot use a mapped drive.
Enter
Settings
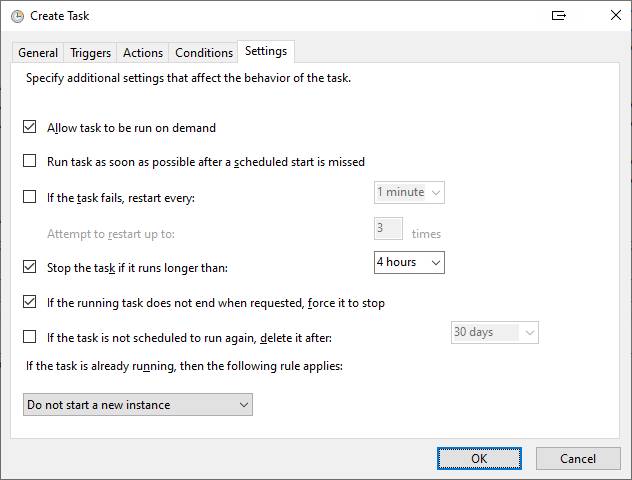
Specify, “Stop task if it runs longer than:” (default to 4 hours or 8 hours if
needed)
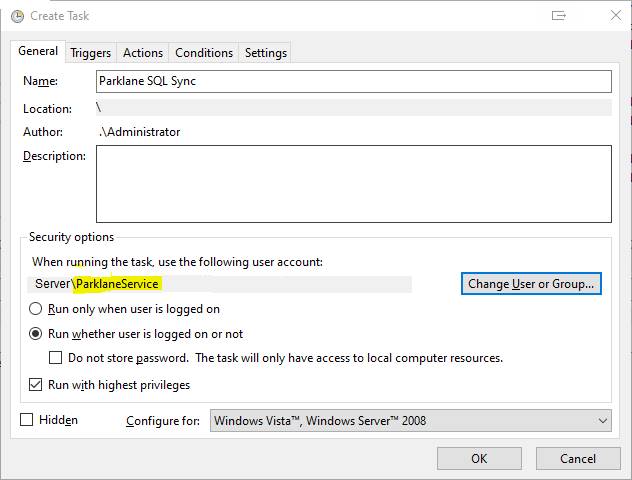
Select
User Account
Select
tab: General
Select:
“Change User or Group”
Enter
the service account: “server\ParklaneService”
Use
the same service account used by “sp2 Thin Client Server” and ensure you have
the account password.
Local
Security Policy: Log on as a batch job
Setup Scheduled Task account
to Log on as a batch job.
Assign: “Logon as a batch job
rights” permissions
Type:
secpol.msc and press Enter
The
Local Security Policy manager opens
Go
to Security Settings – Local Policies – User Rights Assignment node
Double
click Log on as a batch job
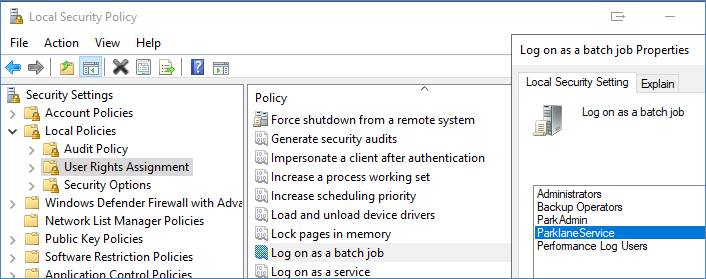
Click
button: “Add User or Group”
Enter
Account: server\ParklaneService
Click:
Check Names
Click:
Okay – twice